Table of Content
Sometimes, manicurists paint the entire hand before curing it under a lamp. Sometimes, manicurists paint and cure them individually. The top coat is the last layer you apply during the gel polishing process. Its protective features also help in creating the highly radiant and glossy appearance you yearn for.
They use a combination of soaking the nails in acetone and filing to remove the nails. The difference is that the salon has professionals working who know how to properly handle nails. Gel nail polish removal is often better left to the pros, but if you want to take the matter into our own hands (ah!), we’ve got you covered. With the right tools and a lot of patience, removing gel nail polish from salon brands such as Shellac, CND and OPI can be done in around 30 minutes from the comfort of your couch. Gel is a type of nail polish that is extremely long lasting and will go with out chipping for as long as 2 weeks.
Acrylic nails
Are you only looking to give yourself a manicure or touch-up in between salon appointments? Are you really leaning into being an at-home technician? Well, that depends on what you’re looking to get out of the process. One of the best things about doing your own gel nails at home is that it’s cheaper than going to the salonespecially if you get them regularly.
Atop these, either acrylic, hard gel, or any combination of both may be applied. Tips are available in many different designs, ranging from solid colors like gel or regular nail polish to graphic designs such as animal prints and metallic colors. Even if you’re not experienced with doing your own nails, it’s pretty hard to mess up this step-by-step system. Using a cotton ball, quickly glide nail polish remover over each nail to get rid of any excess cuticle oil.
Artificial nails
Cuticle oil helps to bring such nails back to shape, making them beautiful and smooth hence easier to paint on. There are numerous types of nail files like emery board, glass, or crystal files. They have the file pattern etched into the glass or crystal, hence the longevity. Keep scrolling for all the tips, tricks, and products that’ll help you create the mani of your dreams at home. The majority of gel customers are readily able to go three to four weeks between fills.
Therefore, DIY gel nails would pay for themselves in three manicures. When done at salons, a gel manicure usually costs around twenty-five dollars or more depending on how much work needs to be done on the nails. For example, if theres chipping or unevenness, then they would need to redo the whole process so it would cost more. Even with the best gel polish removers, going to the nail salon for professional help and minimizing chances of ruining your nail beds is always advisable.
How To Do Gel Nails With Tips
You can apply gel polish to acrylic nails the same way that you would to your natural nail, using the steps outlined above. Gel curing – and especially gel polish removal – can be drying for your nails and cuticles, so investing in cuticle oil helps to keep moisture in the skin or nail plate. If you want to try gel nails but don't know where to start, this guide will give you a step-by-step tutorial on how to apply gel polish.

Lippmann prefers freehand French manis, because stickers and stencils can often get in the way. File your nails to your preferred length and shape . Dont seesaw with your file, just go gently in one direction and back again the other way. Nail clips are clips that you attach to each nail to hold your acetone-soaked cotton against your nail.
How to apply gel nail polish: Step by step
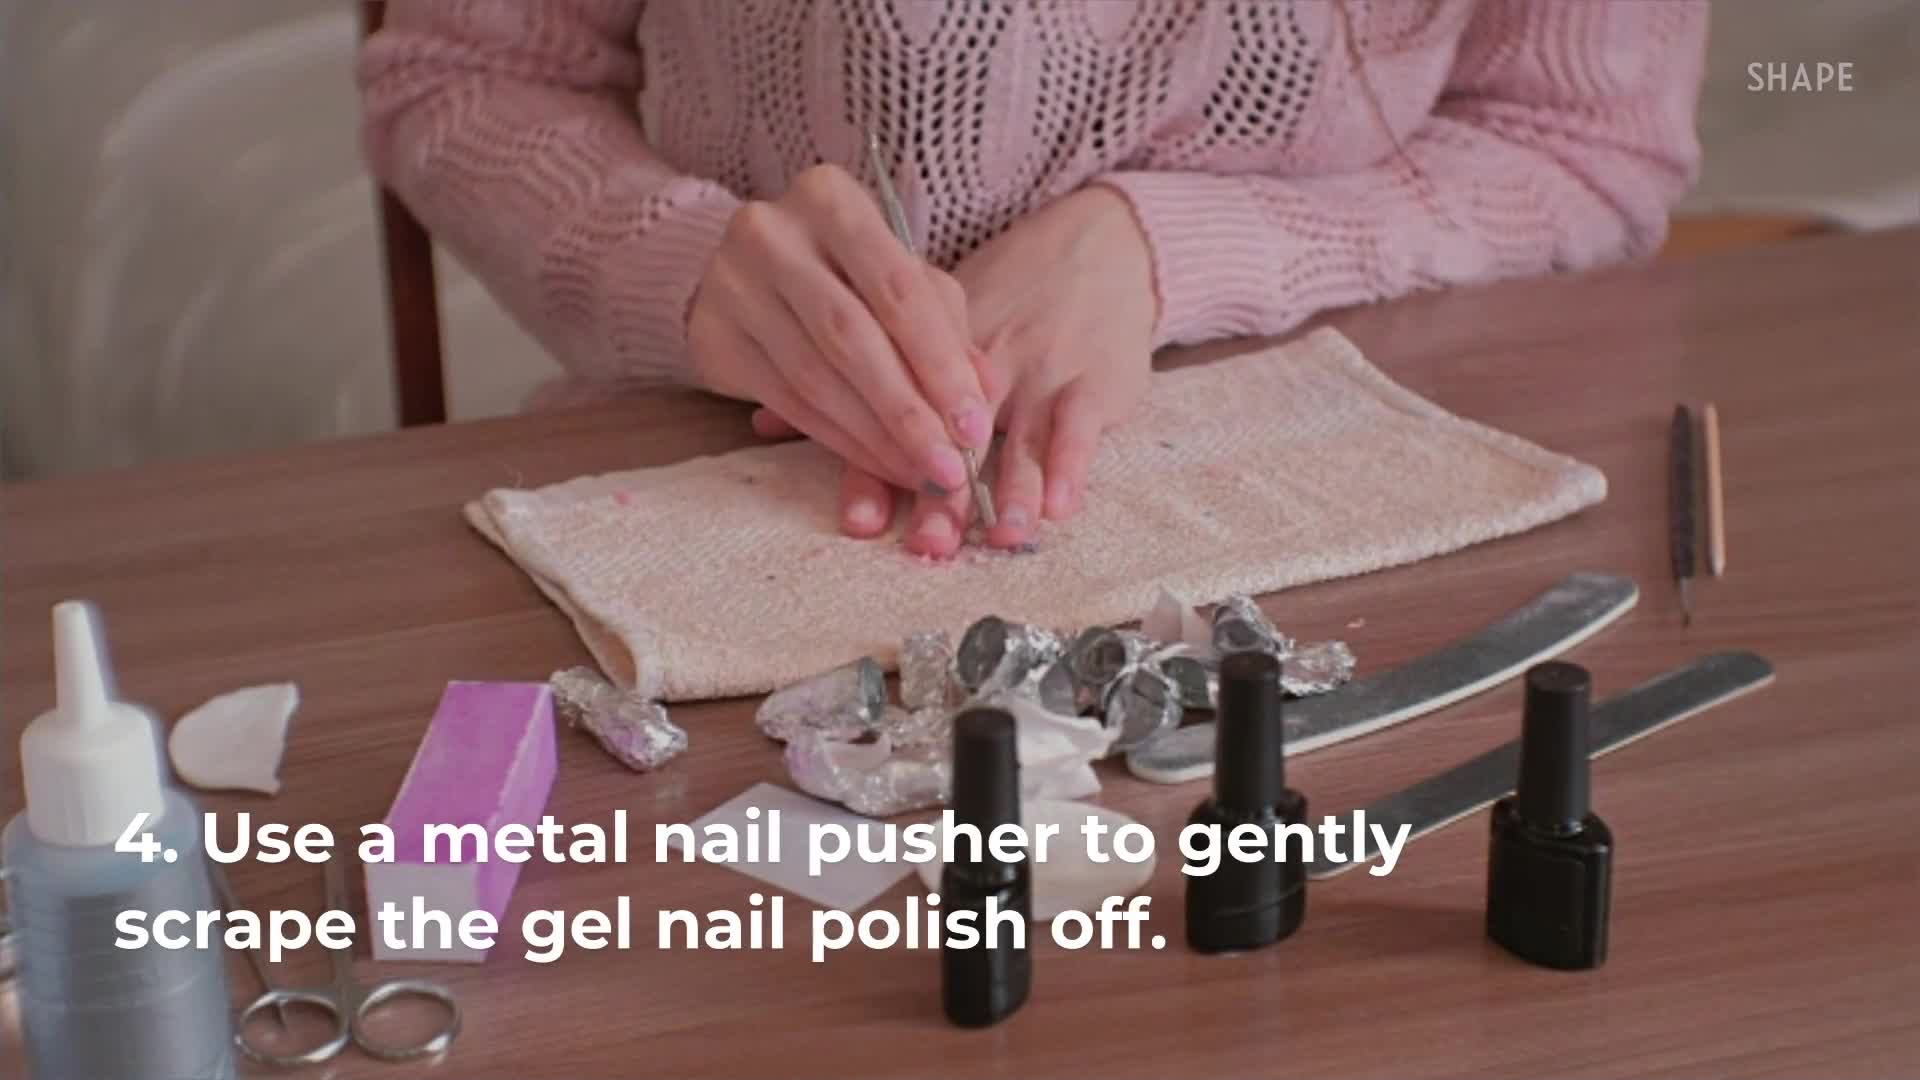
Also, make sure to clean them after a while to keep them safe for use. It's a tool you can't miss if you want to start your journey to do home gel nails. You want to scratch the shiny surface—but not entirely remove the polish underneath.
You’ll want to cure your base coat for at least 30 seconds to a minute before continuing to ensure that it has thoroughly dried. This will ensure that the polish adheres properly and lasts as long as possible. It's worth noting that because there's no curing process involved, the final result isn't as hard as a typical gel manicure. The reviewer didn't seem to mind, though, given that the polish stayed intact without it.
Acrylic nails help conceal or fix broken, damaged, short, or otherwise considered "undesirable" nail appearance. They also help prevent nail biting, breakage, and splits. They are used when people are not able to grow the length and strength of natural nails that they desire or simply desire a new fashion look.
"I had to do multiple rounds under the curing light to get my nails to harden." That said, this kit covers the basics and nothing more. While a minimalist might love the fact that there's only one shade, the tester notes that she wishes there were more colors available with the kit.
This will give a nice curve to the nail and help with the structure as you wanna enforce the stress point of your nail extra. The goal here is only to break down the top layer of polish, without hitting the natural nail. While lamps do produce UV light, the FDA views nail lamps as low risk when used as directed by the label. As with all things, there is one downside — it takes a while for the gel to harden. "The multiple layers of polish make the manicure feel wet and tacky even after drying under the LED light for the recommended 60 seconds," the tester admits.

One by one, place an acetone-soaked cotton ball on top of your nail. Grab a small piece of foil and wrap it around your fingertip to secure the cotton ball to your nail. Gently press the foil, so it forms to your fingertip. You could sandwich the regular nail polish between a gel base and top coat. I’ve done this before and it works fine, but it doesn’t look as nice as gel polish.
In my experience, regular nail polish is not as self-leveling as gel, which makes imperfections more noticeable. I’m pretty obsessed with my nails, and as a beauty writer and product-tester, I try out a lot of products. Some weeks, I might be applying and removing more nail polish than a celebrity manicurist — or at least it feels that way. And my nails can really take a beating with all that typing when I’m on deadline.

Spread ultimate Christmas cheer with these totally adorable Santa Claus-inspired french tips. For this look we have paired festive red tips with a Santa hat feature nail to give your gel manicure the Christmas touch. Begin by creating your french tips using Poison Apple and your Thin Nail Art Brush.


No comments:
Post a Comment